Step by step guide
Premium/Basic Patio Cleaner: Replace Bayonet & O-rings

Learn how to easily replace the Bayonet and the O-rings on your Patio Cleaner with this step-by-step guide. All you need are Torx 25 and a spanner-20mm, or similar tools. Safety first! To prevent any accidents, ensure that your Patio Cleaner is disconnected from your pressure washer.
1. Overview of components
a)O-ring (4,5*1,2 NBR 90): 95-100-704 / Kit: 95-100-794
b)Male bayonet arm: 95-100-703 / Kit: 95-100-794
c)O-ring fixer AVA green: 95-100-448 / Kit: 95-100-794
d)O-ring (8*1.8 NBR 90): 95-100-425 95-100-794
e)O-ring (17*2 NBR 90): 95-100-705 / Kit: 95-100-794

2. Remove Brass Swivel
Use a 20mm spanner or similar tool to unscrew the Brass Swivel.

3. Pull Rotor out of swivel
Be mindful of the two loose plastic shims when lifting the rotor.

4. Remove Front screw
a)The front screw is located under the brush in the front. To access this screw, you need to loosen half of the brush. This is done as follows: Start at the point where the brush is splitted. Press and bend the brush out of the grooves so that you can access the screw in the front.
b)Remove front screw with Torx 25.
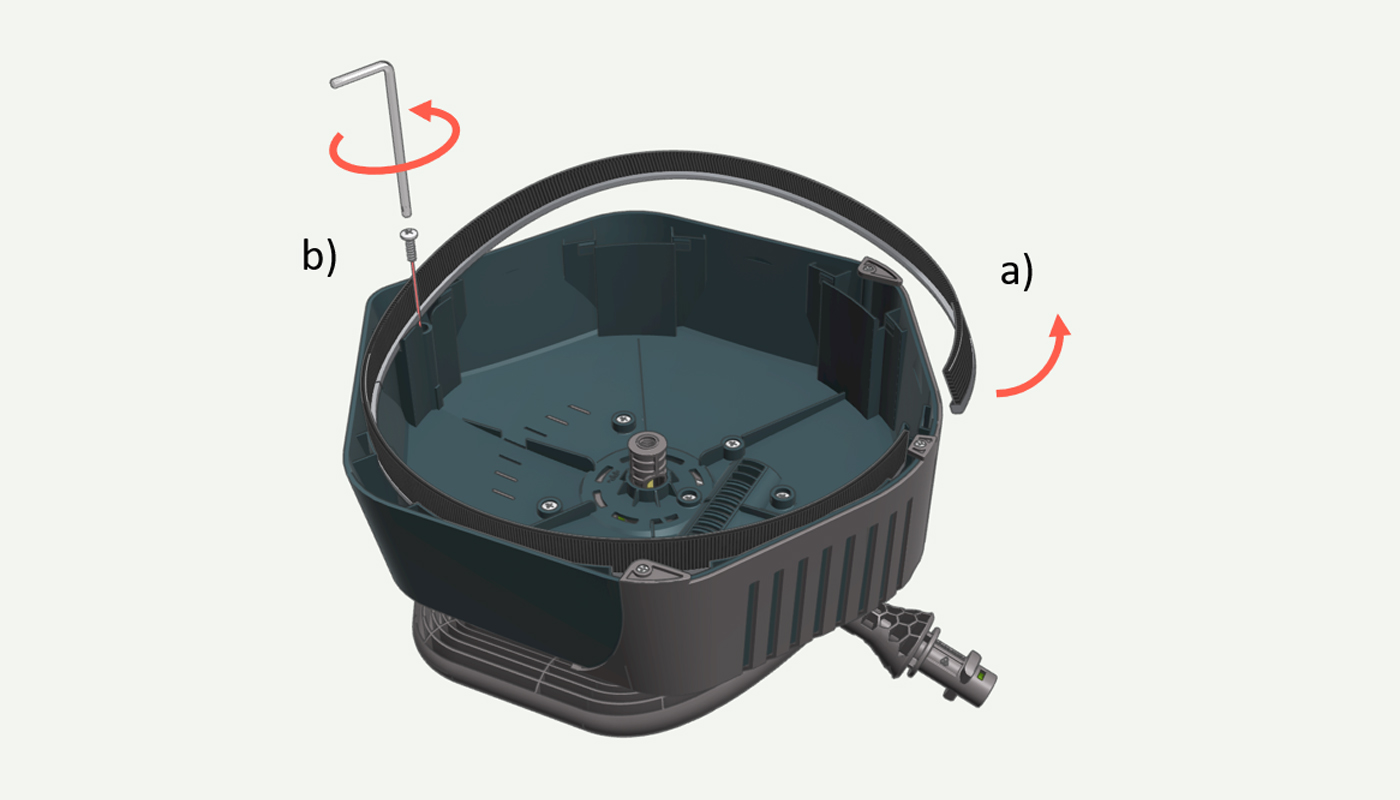
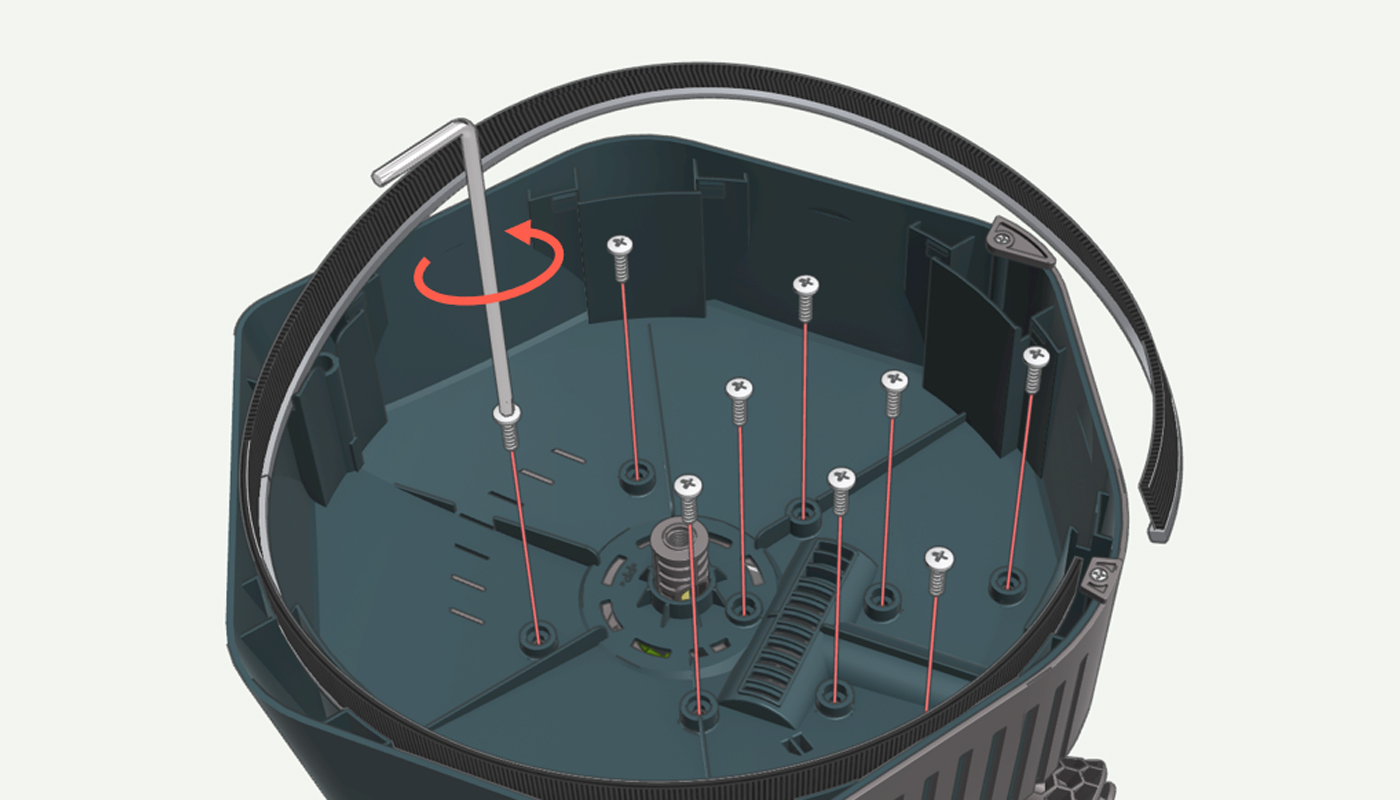
5. Remove screws
a)Remove 9 screws with Torx 25.
6. Lift up the top part
Lift up the top part and turn it 180 degrees.

7. Disassemble Bayonet arm
a)Turn the green button to maximum before you pull out the Beyonet Arm.
b)Pull out the Bayonet Arm.
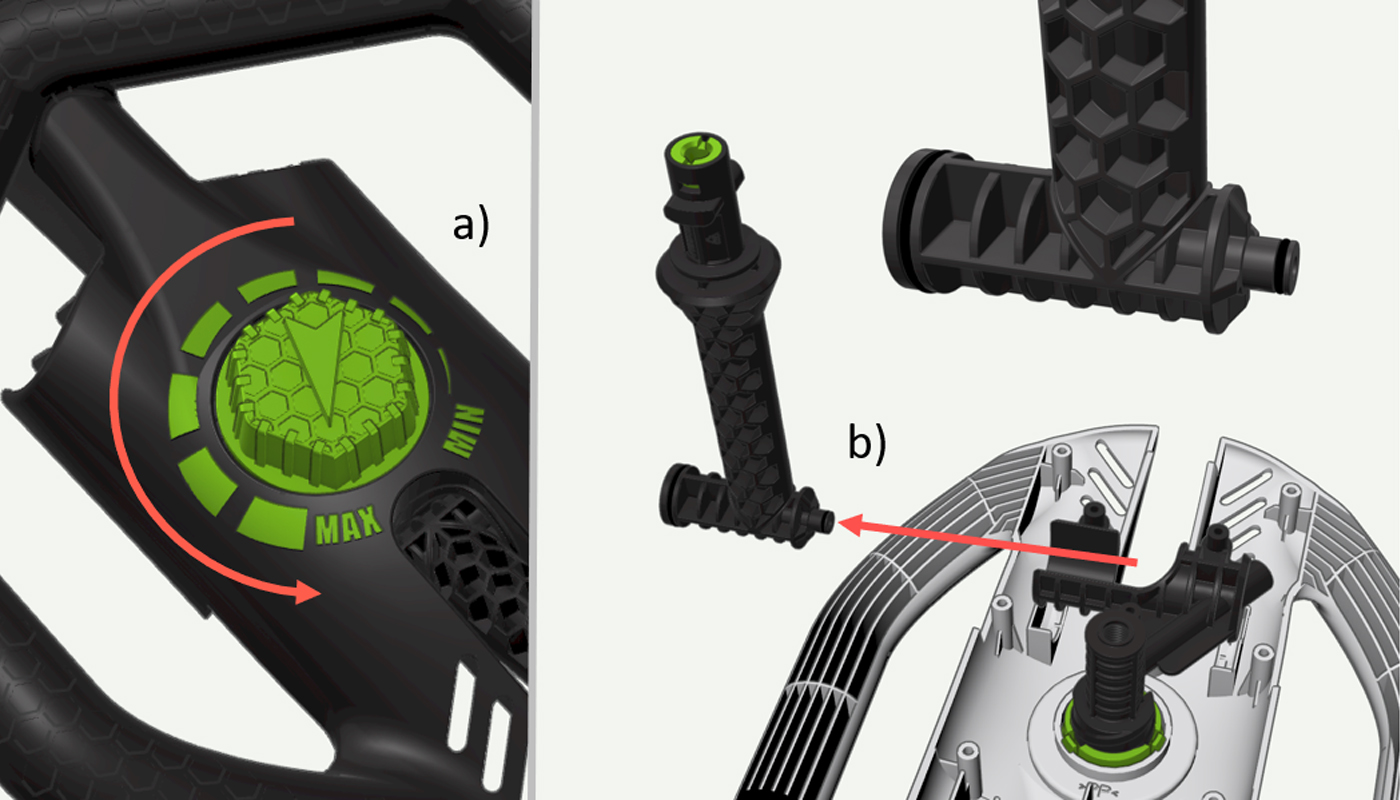
8. Assemble Bayonet arm
a)Insert the Bayonet Arm. Check the O-rings for visual damage.
b) Turn the button to minimum before you proceed.
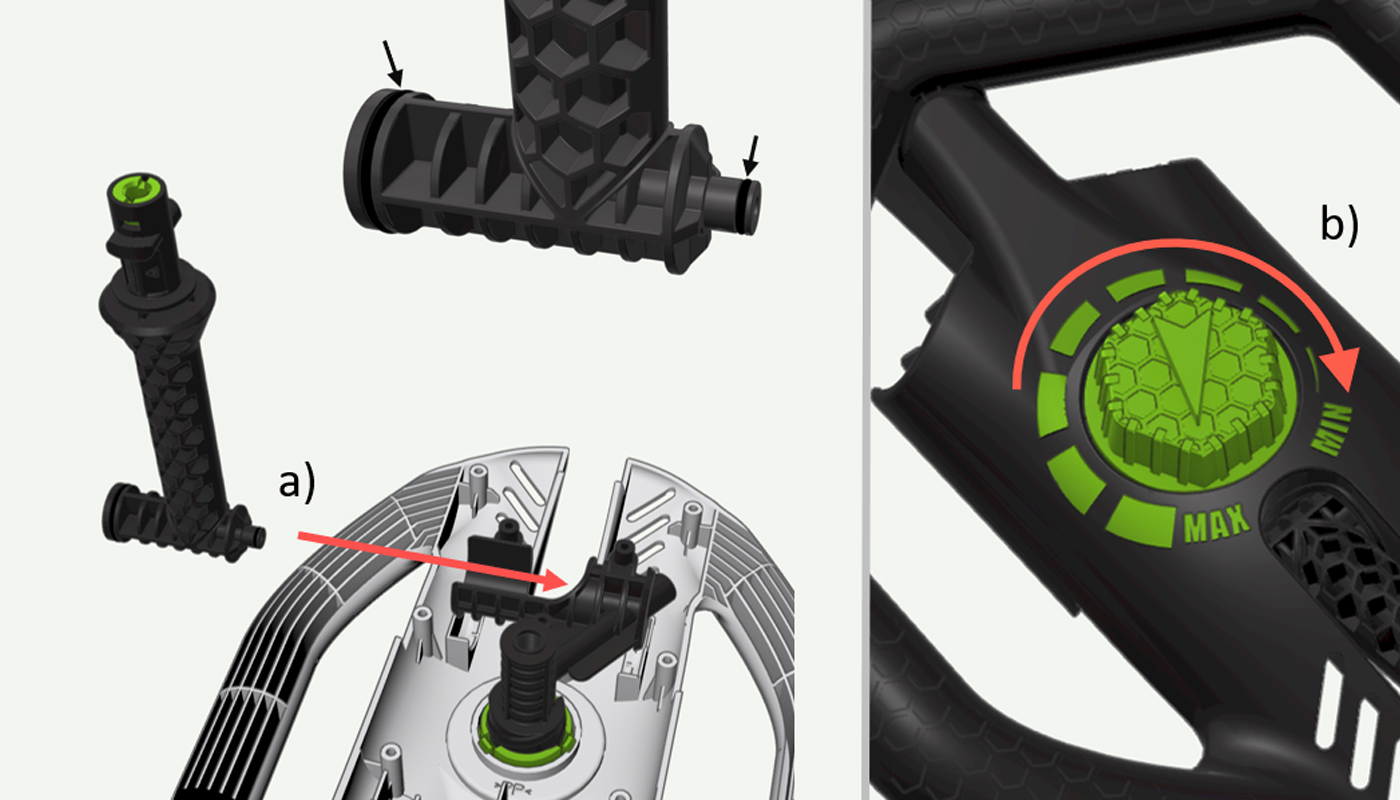
9. Assemble main parts
a)Place the top part in the grooves on the bottom part.
b)Secure the top part to the bottom part with the 9 T-25 screws.
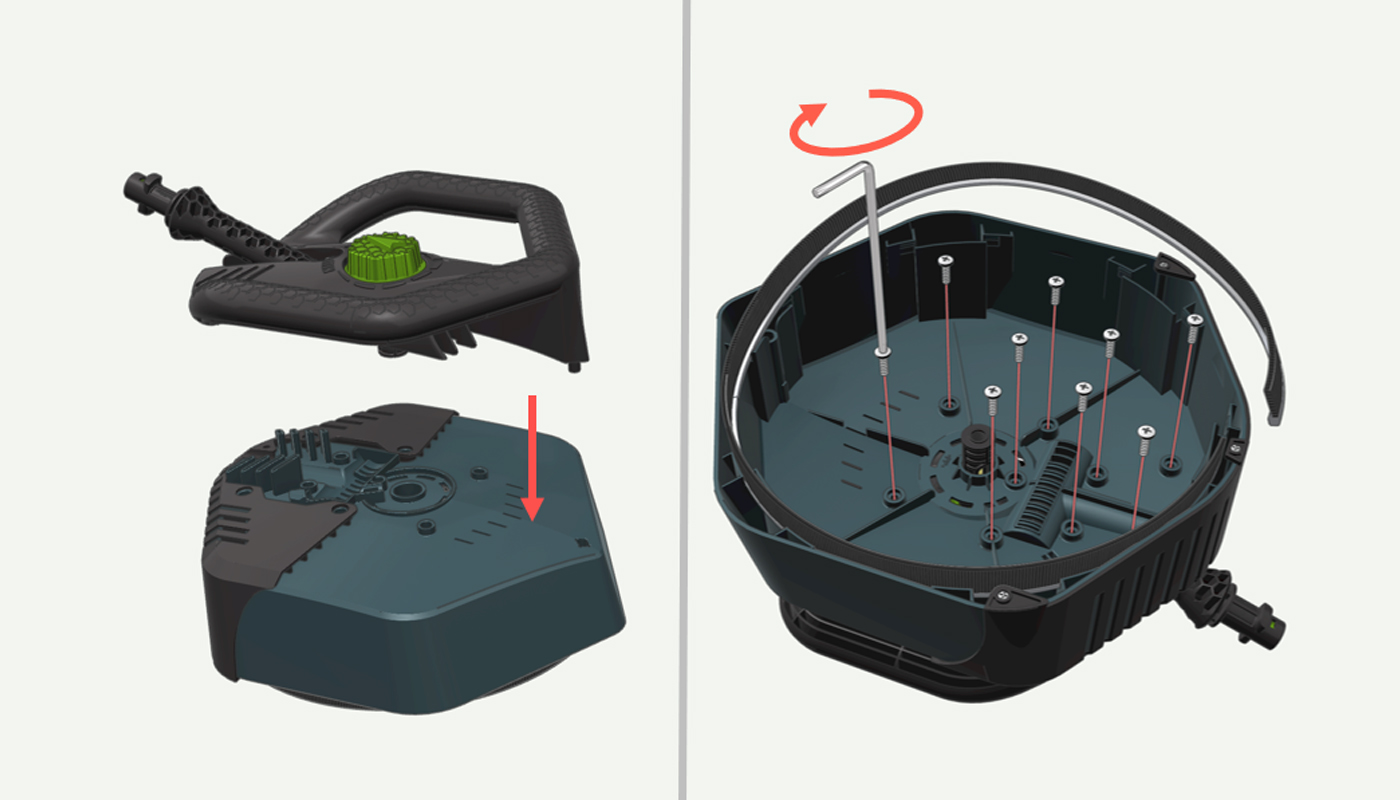
10. Insert Front screw
a)Insert the front screw with Torx 25 key or similar tool.
b)Install the loose brush into its belonging groves. Press and click.
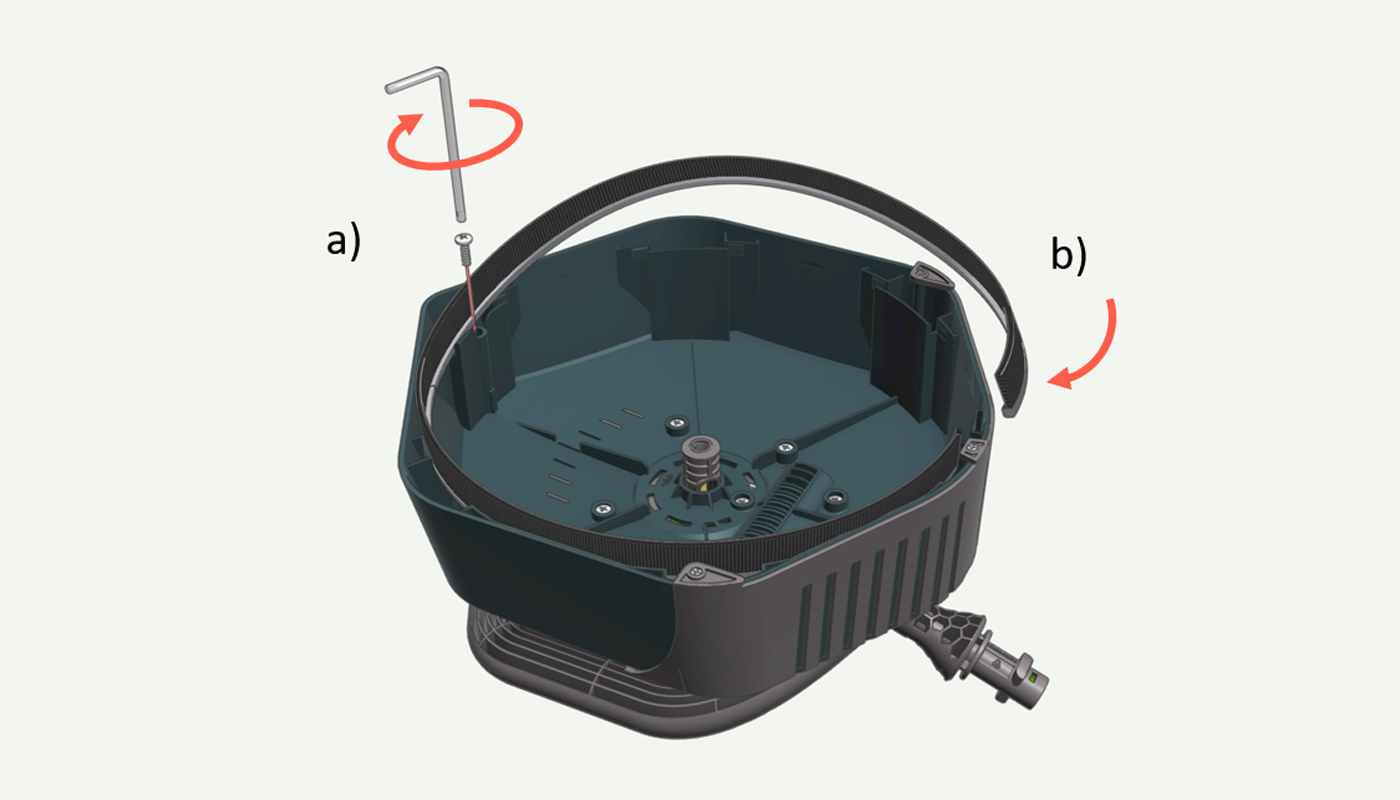
11. Install Rotor
Assemble the Rotor in the following sequence:
a)Plastic shims
b)Rotor with Brass Sleeve. Remember to check the PTF seals for visual damage.
c)Plastic shimsd) Brass Swivel. Remember to check the PTF seals for visual damage.

12. Replace O-ring in Bayonet
a) Use a wide flathead screwdriver or similar tool to turn the O-ring Fixer to the left (counterclockwise) until it stops.
b) Use a narrow flathead screwdriver or similar tool to tilt the O-ring Fixer out of the bayonet.
c) Pull out the O-ring Fixer (Green 95-100-813 P30-P60 ) and the o-ring (1) 8*1.8 NBR 90: (95-100-425).
d) Replace the damaged O-ring/O-ring fixer and assemble them in the bayonet: First, position the O-ring in the O-ring groove. Press the O-ring fixer into place and secure the fixer by turning it to the right (clockwise) until it stops.
